
Quick answer: a strong Stardew Valley Forest Farm layout treats the open clearings as work areas and the wooded edges as a feature, not as leftover space. Start with a short route between the farmhouse, shipping bin, and your main clearing; then choose whether crops, animals, or a scenic mixed farm should get the best-connected ground. Keep one flexible patch open so a first-year sketch can grow with the save.
A Forest Farm layout can feel busy before you place a single building. Trees, stumps, grass, water, and smaller openings divide the map into natural pockets. That character is useful: you do not need to invent every boundary yourself. The trade-off is that a copied rectangle of crops or a screenshot from a different farm map may block the route you actually use.
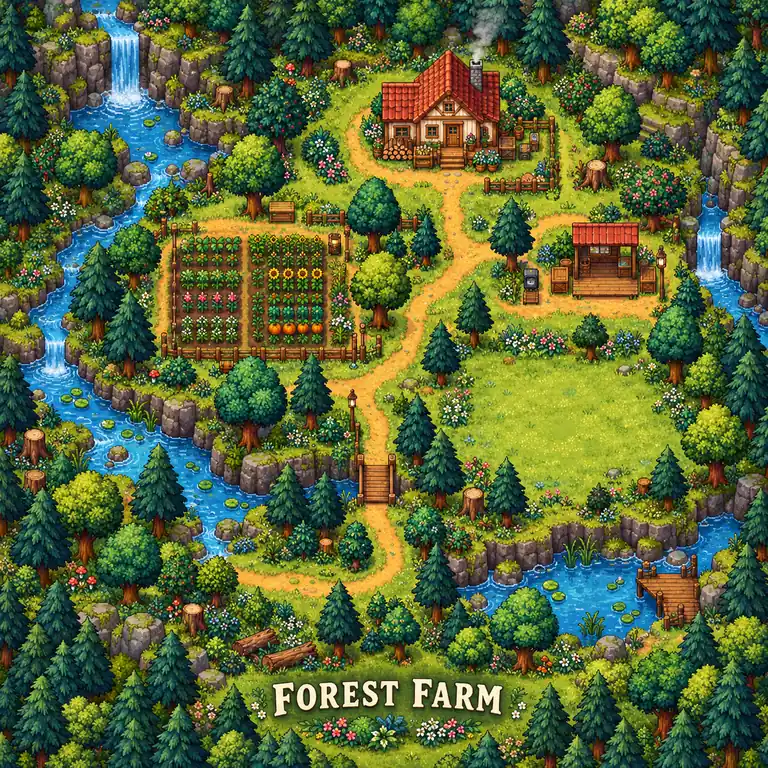
This guide compares three practical plans, explains how to place paths around the map's natural shape, and gives a worked early-save example. The diagrams are editorial planning concepts, not screenshots or exact in-game blueprints. Exact clearable tiles and special map behavior can depend on the current game version, platform, and mods, so check the Forest Farm reference before investing in a tile-perfect plan.
What the Forest Farm changes
The main layout challenge is not simply that the map has trees. It is that the useful ground arrives in irregular openings rather than one uninterrupted rectangle. A Forest Farm rewards plans that connect a few clear work areas and leave natural edges intact. If you clear everything first and decide later, it is easy to remove the landmarks that made the map feel readable.
Before designing, walk the map once and note four things: the farmhouse and shipping route, the largest open patch, the places where natural obstacles narrow movement, and any map-specific resources or forage areas you want to keep accessible. The community-maintained Farm Maps reference is useful for checking map behavior, but your current save is the final authority when mods or version changes are involved.
| Map feature | Planning question | Useful response |
|---|---|---|
| Irregular clearings | Which opening can hold one complete routine? | Give the largest connected patch to your highest-frequency job. |
| Wooded edges and obstacles | Which path must stay passable every day? | Keep a clear route along one side before adding decorative paths. |
| Resource or forage pockets | Do I want access later in the season? | Reserve access and avoid turning the whole edge into a building row. |
| Limited open ground | What can wait until I know my routine? | Keep a buffer rather than filling every available tile. |
That last point matters. A visually full farm is not automatically an efficient farm. On a map with natural dividers, a short reliable route is often worth more than squeezing one extra row of crops into a corner that requires a daily detour.
Choose a layout goal before placing buildings
Pick one priority for the next season. “More crops,” “fewer daily steps,” and “a farm that feels like a forest” are different goals, so they need different layouts. You can mix them later, but choosing a first priority prevents a common redesign loop: moving every building because the original plan tried to optimize everything at once.
| Priority | Give the best-connected area to | Trade-off |
|---|---|---|
| Crop income | A compact crop block, nearby chest space, and a route to shipping. | Less room for scattered buildings and decorative clearings. |
| Low daily upkeep | Animal buildings and machines grouped along one repeatable loop. | The layout may be less symmetrical and reserve more walking space. |
| Scenic forest feel | Existing trees, open sightlines, small gardens, and a few connected paths. | Some ground stays intentionally unproductive. |
| Flexible first year | A stable path and one useful work area, with a large expansion buffer. | Short-term output is lower while you learn what the save needs. |
If you are unsure, use the flexible first-year option. A crop patch can move; a blocked route or a building placed in the only useful opening is harder to live with. Mark the next likely project, such as a coop or shed, without committing every surrounding tile to it.
Three practical Stardew Valley Forest Farm layout ideas
These are starting patterns, not ranked blueprints. Match the pattern to your save and the open space you actually have. The best layout for a Forest Farm is the one that makes a repeated task easy while preserving the parts of the map you enjoy.
1. Compact crop loop
Use the largest clear opening for one manageable crop block. Keep its chest or processing stop on the edge nearest your farmhouse route, and leave a service strip for scarecrows, machines, or a temporary path. The goal is a complete watering-and-harvest routine that does not cross the entire farm. If the clearing is narrow, split crops into two short beds rather than widening one bed through a natural choke point.
2. Mixed production loop
Put animal buildings, a shed, or processing machines near one another along a route you already walk. Keep the open crop area separate enough that harvesting does not weave through doors and machines. A mixed farm works well when the Forest Farm's natural pockets become zones: one clearing for crops, one edge for animal care, and a path connecting the farmhouse, shipping bin, and production. Avoid putting a high-frequency building behind an obstacle just because the spot looks tidy on a static map.
3. Scenic, low-maintenance grove
Keep more trees and open ground, and use only a few paths to connect a small crop garden, a resource pocket, and the main entrance. This is a good fit if decoration and foraging matter more than maximum crop rows. Use repeated materials or short tree lines to make the zones feel intentional, but leave the route wide enough for ordinary movement. Empty space can be the design feature rather than a mistake to fill.
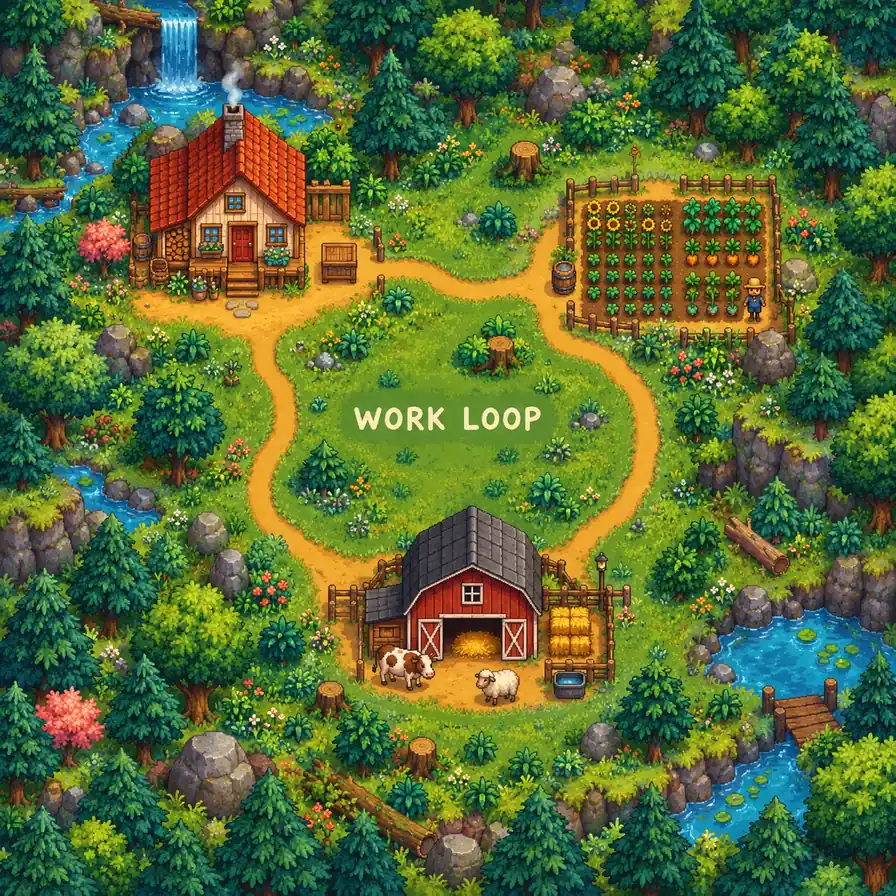
For a quick comparison, start from the task you repeat most. If you harvest every morning, favor the crop loop. If animals and processing occupy most of your day, put those stops together. If you mainly want a comfortable-looking farm, keep the forest as a visible part of the plan instead of treating it as a set of tiles to clear.
Plan paths around a real work loop
A Forest Farm path should connect useful places without cutting the map into narrow dead ends. Draw only the route you expect to use first. You can add decorative paths after the daily loop works.
- Mark the fixed points. Find the farmhouse, shipping bin, exit direction, and the main clearing you want to use.
- Draw the shortest repeatable route. Connect the house to shipping and then to the area you check most often.
- Check every pinch point. Walk around stumps, trees, water, and building footprints. Leave access where a resource or forage area matters to your plan.
- Reserve an expansion buffer. Keep one nearby patch unassigned for a future building, tree, or seasonal change.
- Test the sketch, then test the save. Use the planner to compare broad placement, then confirm exact footprints and movement in your current game.
Do not build a path because every zone needs a border. In a small clearing, one edge route may be enough. In a production area, a short spur to a shed can save more steps than a decorative loop around the whole farm. Think in terms of “where do I go next?” rather than “how do I make the map look evenly tiled?”
Worked example: a flexible first-year Forest Farm
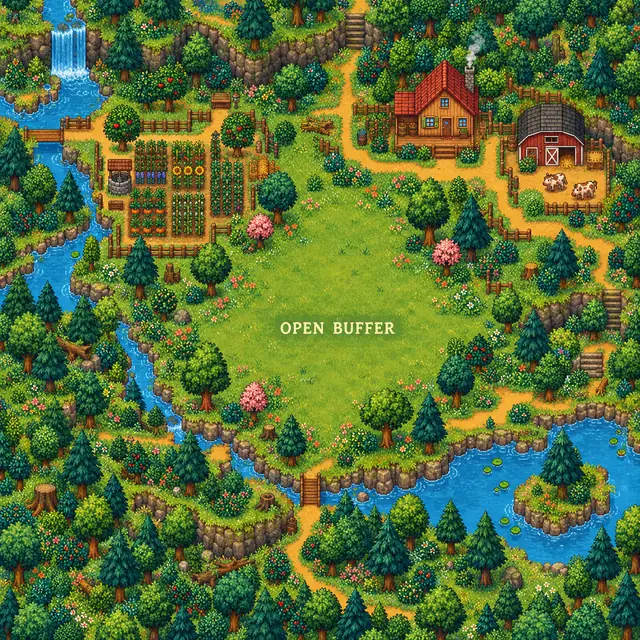
Imagine a new save where you want a small crop income now, animals later, and a farm that still feels wooded. Begin by choosing one open clearing for a compact starter field. Put the chest and a short path on its farmhouse-facing edge, then keep a direct line to the shipping bin. Do not clear every tree around the field just to make its border rectangular.
Next, reserve a nearby patch for a future coop or shed, but do not fence it yet. Mark the resource pocket or hardwood access you care about and leave its approach clear. The unused buffer is part of the plan: it lets you move the coop after you learn where your daily route feels awkward. When the second season starts, review the loop before expanding the crop block. If the routine still works, add rows; if it does not, move the chest or path first.
You can draft that relationship in the site's farm planner without treating it as a game validator. The planner helps compare zones and preserve a sketch locally. It does not encode every Forest Farm obstacle, collision rule, mod, or current version detail, so use it for the layout question and verify exact placement in-game.
Common Forest Farm layout mistakes and limits
- Clearing the map before choosing a goal. Keep natural landmarks until you know which opening your routine needs.
- Copying a Standard Farm grid. A rectangle may cross an obstacle or use the wrong clearing on a Forest Farm.
- Building through the only easy route. Check the walk from house to shipping before placing a low-frequency structure.
- Filling every empty tile. A buffer is useful working room for future buildings, trees, and changing seasonal plans.
- Treating a concept diagram as an exact blueprint. The visuals on this page explain planning relationships; they are not screenshots and do not encode tile coordinates.
Map details can be affected by game updates, platform differences, or mods. We avoid fixed tile totals here because a number without the exact map version and footprint assumptions can mislead more than it helps. Before a costly rebuild, check a current reference and confirm the space in your save.
FAQ
What is a good Stardew Valley Forest Farm layout?
A good Forest Farm layout connects the farmhouse, shipping route, and your most-used work area while keeping natural edges and one expansion buffer. Choose a crop-first, mixed-production, or scenic plan based on the routine you want to make easier.
What is the best layout for a Forest Farm in Stardew Valley?
There is no universal best layout. A compact crop loop suits a crop-focused save, a grouped production loop suits daily animal and machine checks, and a grove-style plan suits players who want to preserve the map's wooded character.
Can I use a Standard Farm layout on the Forest Farm?
You can reuse the planning principles, but not assume the same footprint will fit. Forest Farm openings and obstacles change where a crop block, path, or building can work. Re-check the route and exact map space before copying a design.
Should I clear the trees before planning my Forest Farm?
Not all at once. First mark the route and the clearing you need, then remove only what blocks that plan. Keeping landmarks and resource access visible makes it easier to avoid clearing an area you later wanted to preserve.
Can the Stardew Valley farm planner verify Forest Farm tiles?
The planner on this site is a visual sketching tool, not a complete collision or save validator. Use it to compare zones and routes, then confirm precise tile placement, building footprints, and current game rules in your save or a current reference.
Bottom line
Plan a Forest Farm from the openings and routes that exist, not from a perfect rectangle copied from another map. Choose one priority, connect its daily loop, keep natural edges where they matter, and protect one buffer for the next season. A small sketch in the Stardew Valley farm planner can help you compare ideas before you commit in game.
For broad principles that work across all maps, continue with the Stardew Valley farm layout guide. For map-specific facts, check the community-maintained Forest Farm reference.